


Build a Simple Contact Me Form with React, Node, and Nodemailer Package


So, a few days ago I decided to create my portfolio from scratch with React.Js. Everything was going smoothly until I started building the contact me page. It was trickier than I anticipated. In this very first article of mine, I will try my best to explain everything I learned in a concise and clear way so you don't struggle like me. Without further ado, grab a cup of coffee, and let's get started!
Prerequisites
Before continuing this article, it's not crucial but better to have some knowledge about:
- HTML
- JavaScript ES6
- React.Js basics
- Node.Js basics
Alright! I give you spoilers so we can have an idea about what we're going to accomplish.
- Create a simple React web application for the contact form
- Create a simple server with Node.Js to handle the post request
- Host the server with Heroku for free so we can use it as a REST API
I will walk you through every step. If you already know these steps, you can just move to the next sections. 🙌
Create a new React project
Let's first create our simple form page with React. Open your preferred code editor (Mine is VS Code so I'll use it). Then open a new terminal and type pwd to see your current directory. You can also type ls to see available directories then type cd folder name to head over to the desired directory to create your react app folder. I will use my desktop for this tutorial so I type cd Desktop.
It should look like this:

Next, to create a folder type mkdir folder name. I will name it react-contact-form so I type mkdir react-contact-form in the terminal.
Now, you should be able to see the folder created on your desktop, cool right? Again, type cd folder name to get into the folder we just created.
We will use npx create-react-app my-app command to create our react app. Let's name our app as 'client' so it will be easier to distinguish when we add 'server' to our simple app. Type npx create-react-app client and wait until it's done. (it will take a few seconds)
Don't forget to type
cd clientto get into our folder.
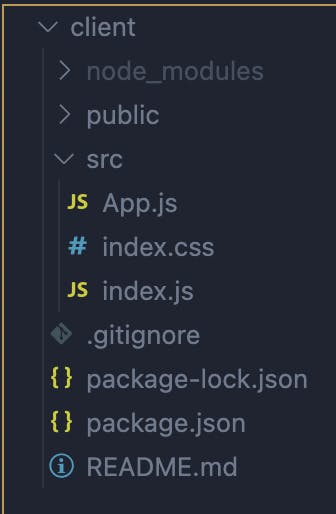
Let's open the folder in our code editor, and clean some files in the src folder that we're not gonna use.
When it's done, it should look like this:
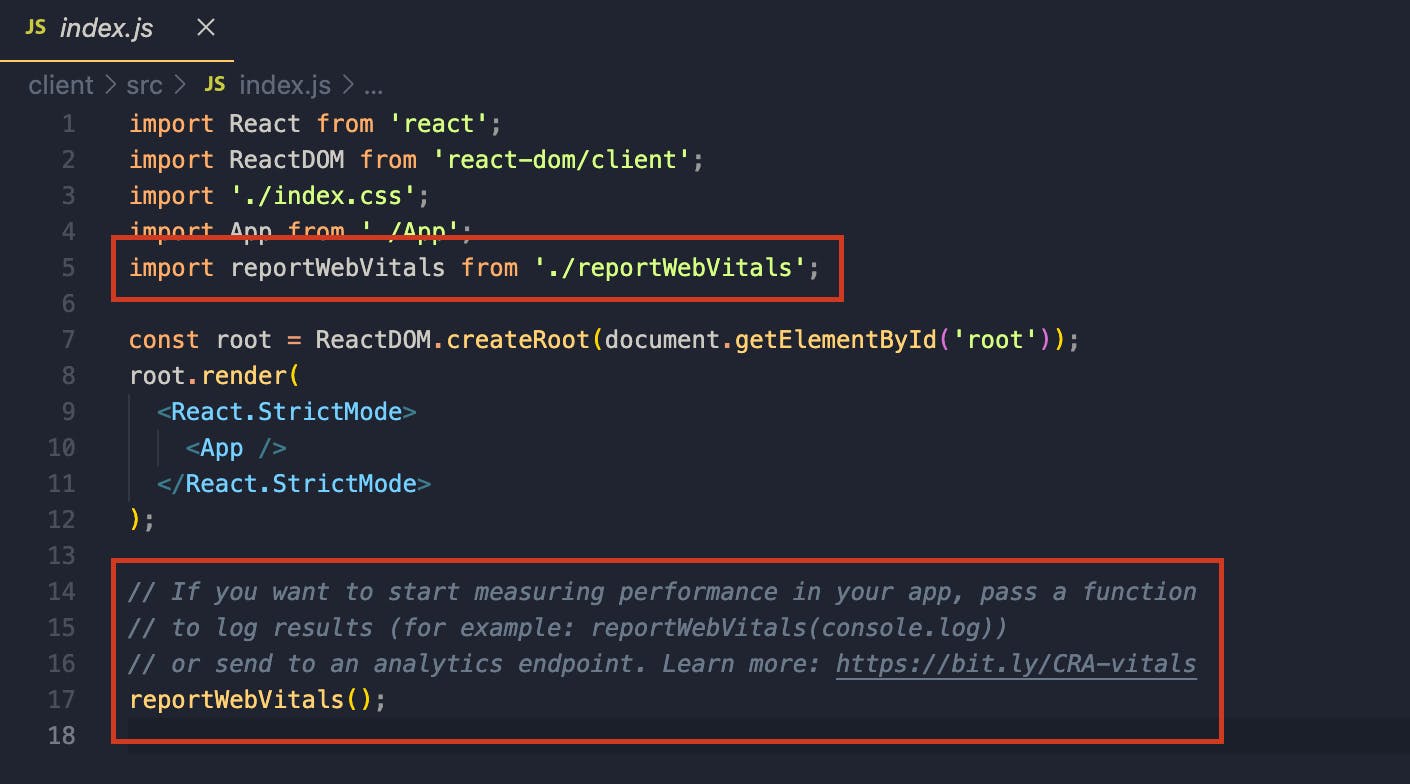
Since we deleted some files, our react app will scream at us if we don't make some more clean-ups. So, head over to the index.js file and delete these lines:
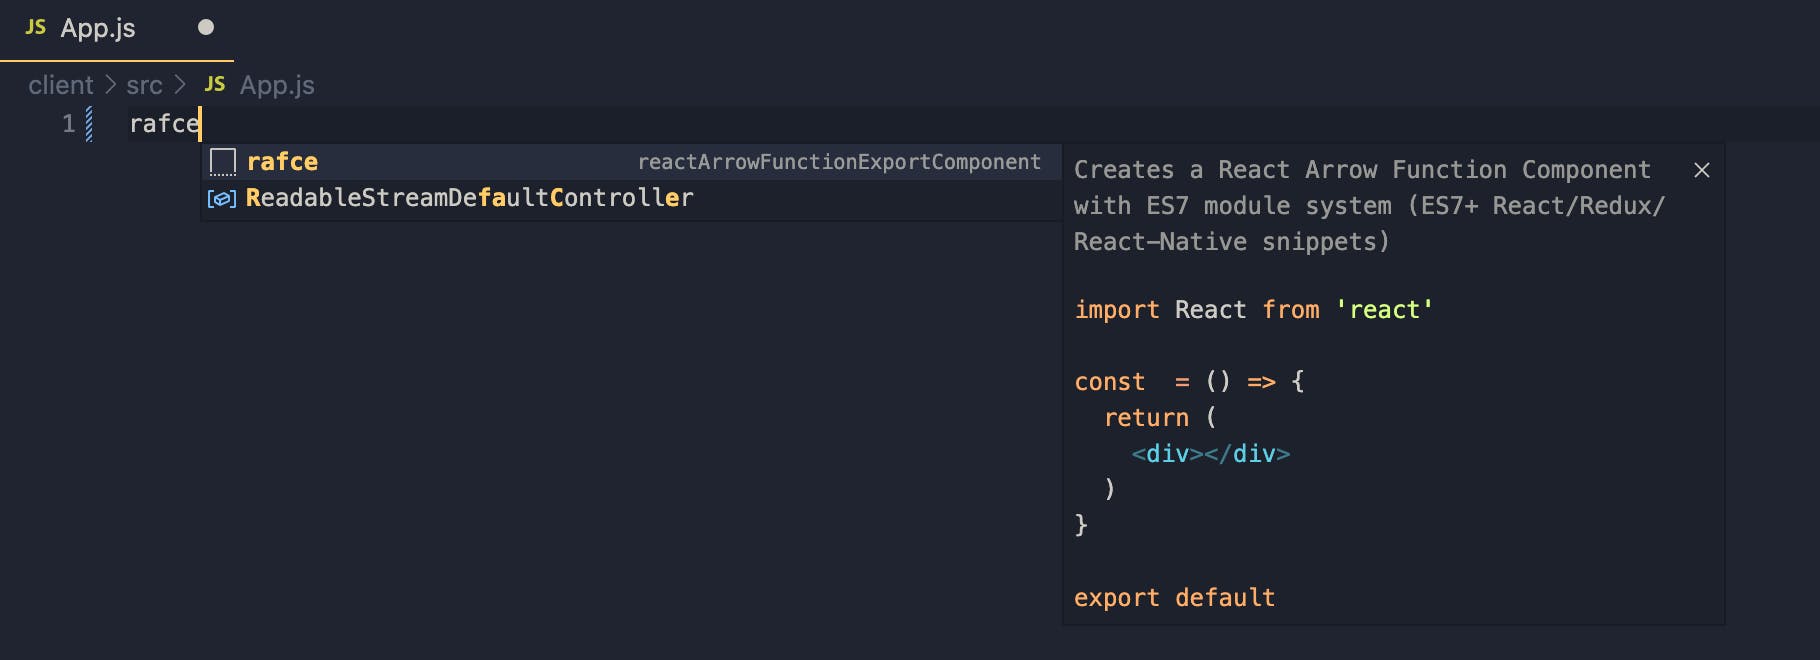
If you are using VS Code editor, I highly recommend installing "ES7+ React/Redux/React-Native snippets" extension so your life becomes easier.
Now, open the app.js and delete everything so we can start fresh. Type rafce to create a functional component.
Now our app.js looks like this:
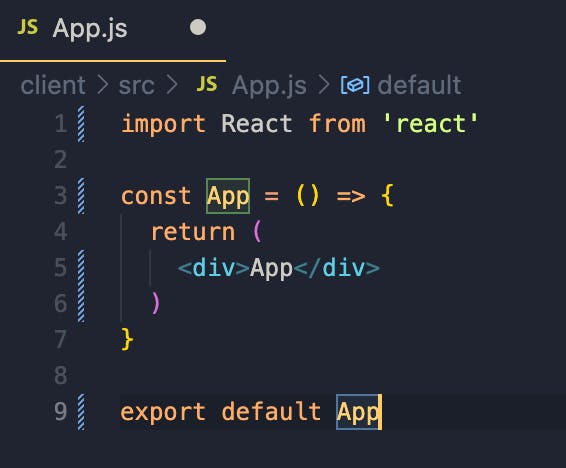
If it does, great job! We are ready for the next step which is creating our first component for the contact form page.
Create the form page component
In the src folder, create another folder named components and create Formpage.jsx file. (Here you can name it whatever you want. I like to be descriptive when naming stuff.) In the file you just created, type rafce and hit enter.
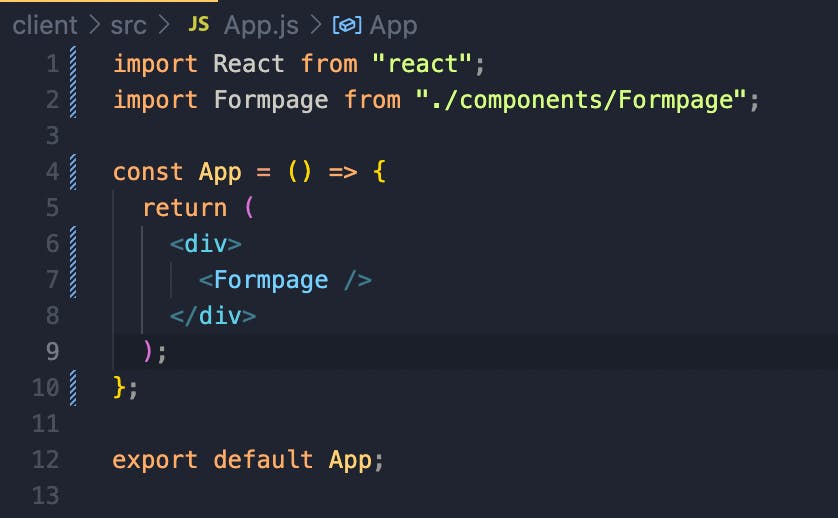
Then go to the app.js and add our form component and don't forget to import it as well. When you're done, your app.js should look like this:
In the terminal, be sure you're in the "client" folder, type npm start and voila, our basic react app is ready to go.
Alright, we can finally make our form page look like one. For the sake of brevity, I won't worry about making our page pretty. This will be your job when we are done! 🥰
Disclaimer: I added a couple of divs and styles so it doesn't look completely ugly.
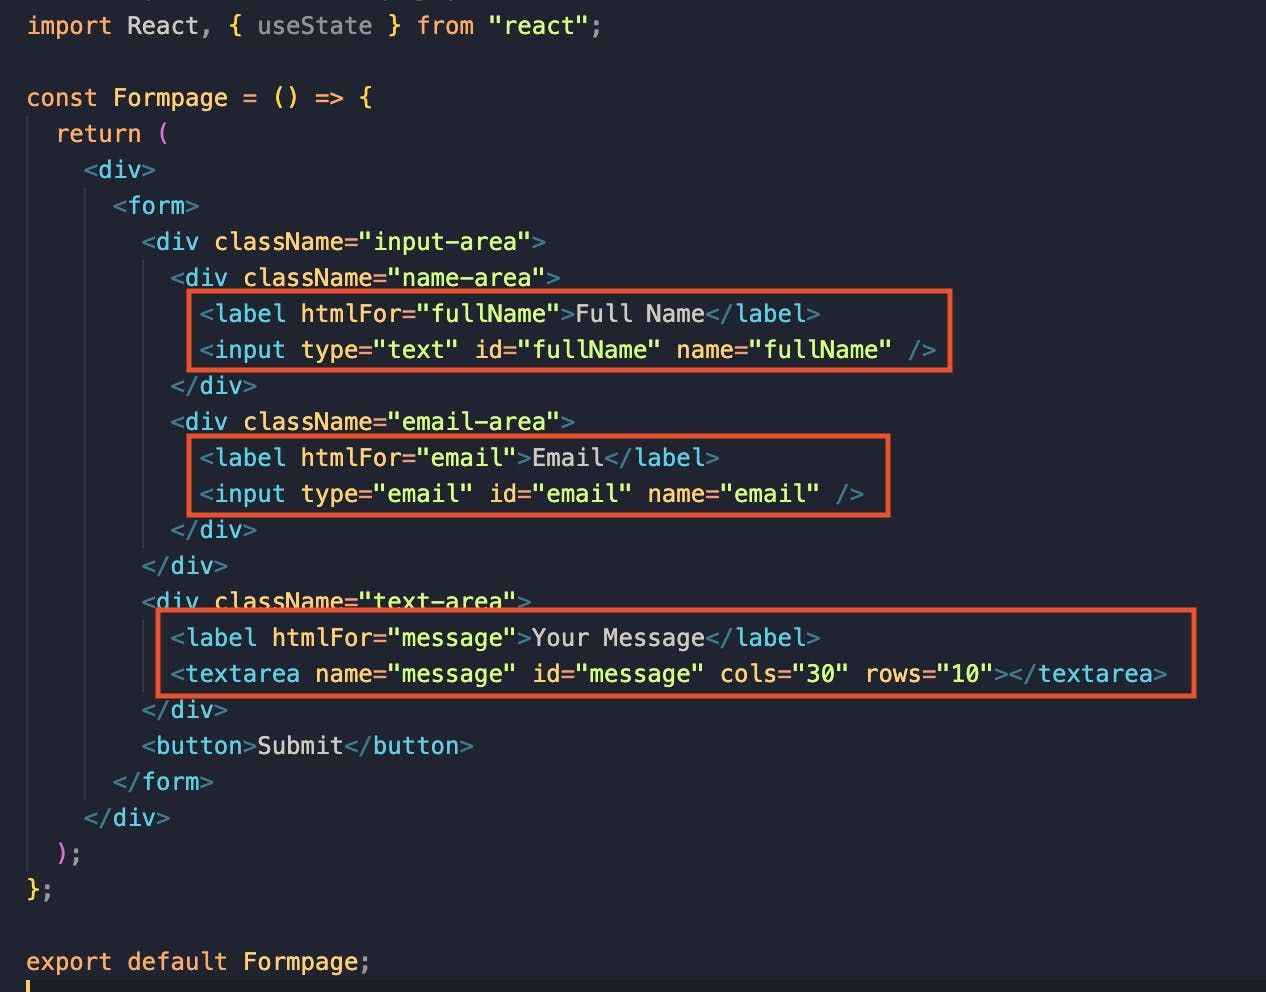
To keep things simple, I only added name, email inputs, and a textarea for the message. I also added labels for better accessibility. The form component's code should look like this:
Declare our states
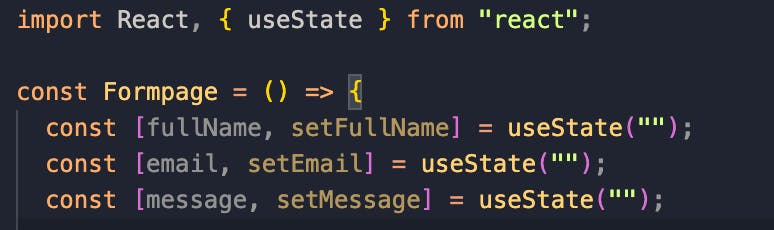
We are going to use one of React's native hooks useState in order to keep tracking of our data and store it. So we can use this data later on when submitting our form to the server. You can import useState from React and use it.
Since we have 3 inputs, let's declare three states and set them as empty strings as a starting point.
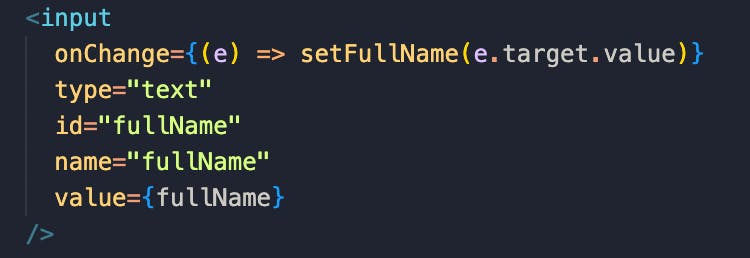
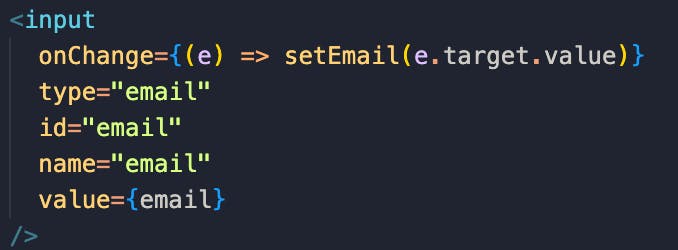
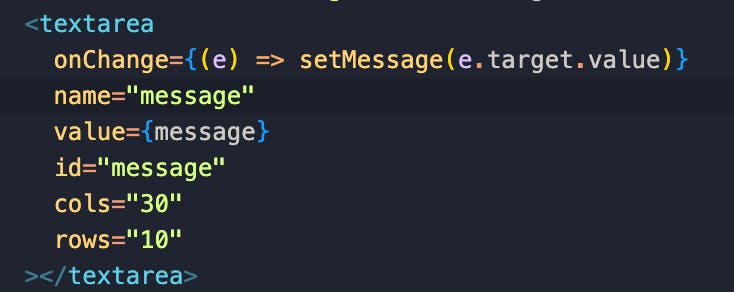
Great! Now, how do we know what the user typed and store it? To solve this problem, we are going to use onChange function in React. This will allow us to keep track of whatever the input is. We can write this function as a function block or a simple arrow function. I will use the second option since it is a little bit clear.

Here, we pass an event to our function so we can reach the data inside the input field. Then, we simply set our state to whatever the input is.
onChangeallows you to continuously track the data change in the input field. You can check this usingconsole.log(fullName)and type some dummy text in the targetted input field.
Submit the form
Normally, the HTML form element is different than other elements. It can fetch a post request by simply declaring the action attribute and a path to post. What we are going to do is a little bit more complicated than using this method but the result is going to be worth it.
Let's create a handleSubmit function to call when the form is submitted where it posts the data to REST API. We are using fetch to post our stored data to the server.
For now, the
handleSubmitfunction should look like this:
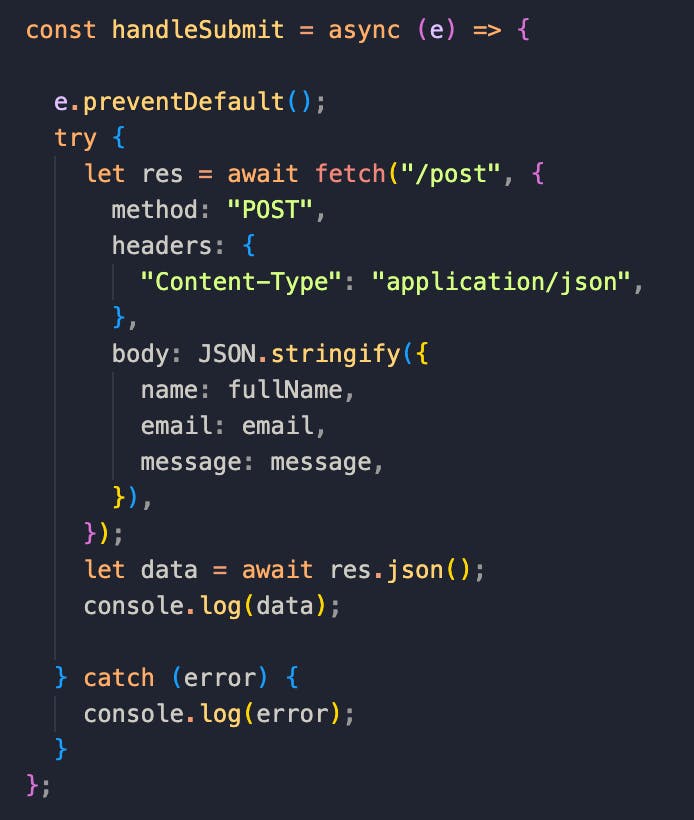
As you see, we are using the ES6 async function for a more concise code and passing an event so we can call preventDefault() method on event. Then in the try - catch block we are using the fetch API to post a request to our server.
fetchAPI lets you fetchpost,get,put,patchordeleteHTTP requests. For further details you can check MDN docs
When we fetch something, we have to include a few options like method, headers, and body.
We are adding:
methodto simply tell our action. (In this case, we are posting data)headersto tell what type of data we are fetching ("Content-Type": "application/json")bodyto hand the data we stored (fullName, email, message)
We're using
JSON.stringifyso our server can read the data.
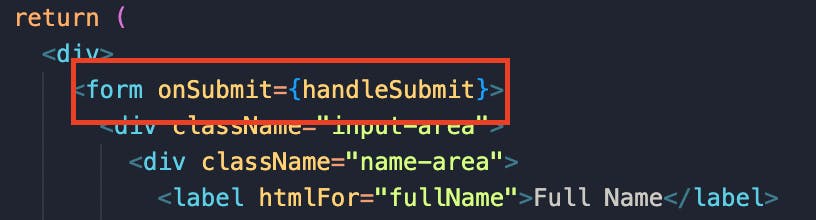
Don't forget to pass the handleSubmit function to the form element.
Then we just wait for the res (response) to return from our server. First, we're logging data to see if we successfully fetched the data.
Create our Node.Js server
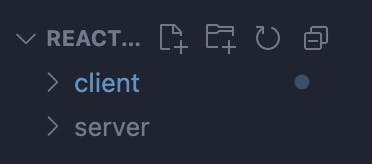
In the root folder, let's create another folder named server, open another terminal, and type cd server.
You can open another terminal from here:

Cool! Before starting, we must install a few packages. In the server terminal:
- First, type
npm init -y(this will create a package.json file) - Then, type
npm install express cors nodemailer(these are all the dependencies we need for our project) - Finally, type
npm install -D nodemonto install nodemon package as a dev dependency.
We are using nodemon because we are lazy. We don't want to kill and restart our server anytime we make a change.
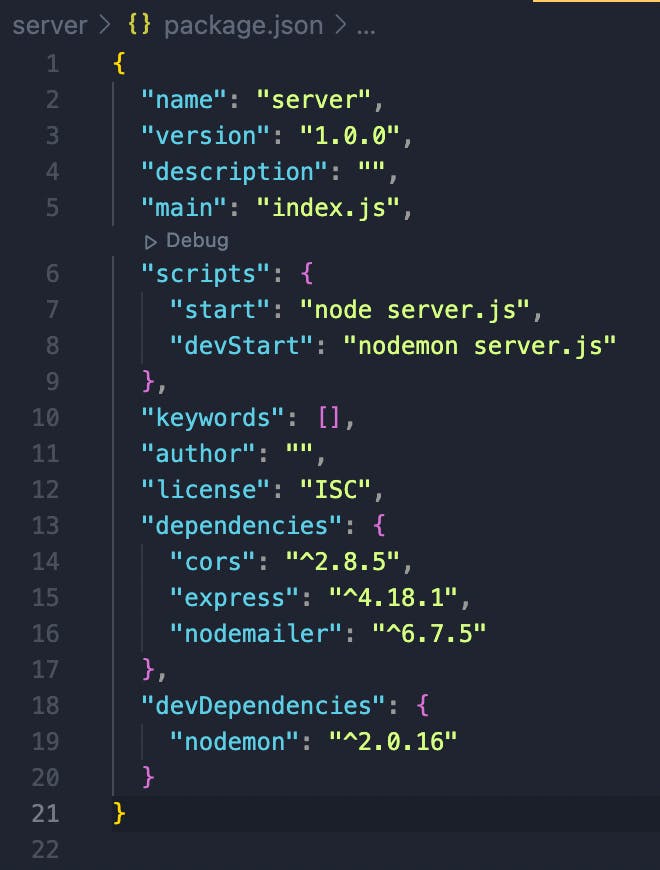
Now, we can open the package.json file to add a few lines of code. Inside scripts add "start": "node server.js" and "devStart": "nodemon server.js". This way, we can simply type npm run devStart command to start our server. Also, change "main": "index.js" to "main": "server.js". The package.json should look like this:
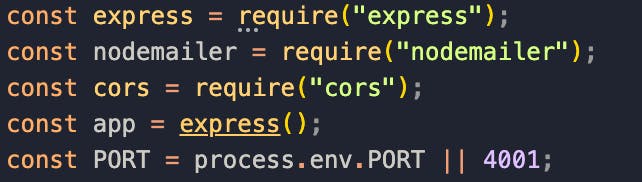
Let's create our server.js file by typing touch server.js in the server terminal. (You can use VS Code's GUI but typing commands is what cool kids do.) Inside our server file, we are going to require some packages. The first one is express.
We can build our server with pure Node.Js but
Expressmakes handling the HTTP request and routing much easier for us. (Remember, we are lazy programmers.)
First, let me show you the file:
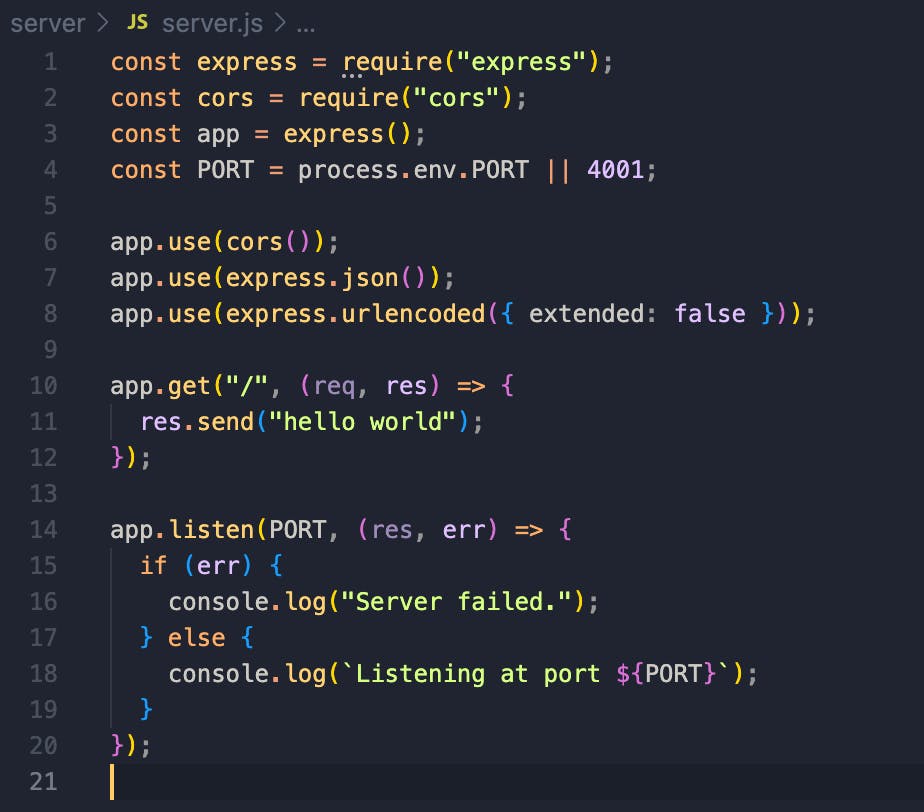
corsstands for "Cross-Origin Resource Sharing” and our cors package will handle the CORS errors.
process.env.PORT || 4001we are using environment because when we host our server, the path we use will change. So, in practice hardcoding the path only as4001will lead to problems.
app.use(express.json())remember, we are handing the data asjson. We must tell our server to useexpress.json()so it can parse it.
So, this is a very basic express app that we are creating. In order to be sure that our server works fine, we put a path for get request and send a simple message back saying "hello world". Now, in the server terminal, type npm run devStart command to start our server and go to localhost:4001.

If everything goes well, you must see our traditional "hello world" message. Yay, our server is alive!
At the moment, our server only responds to get requests on the / path. Let's tell it also respond to post requests on the /post path.
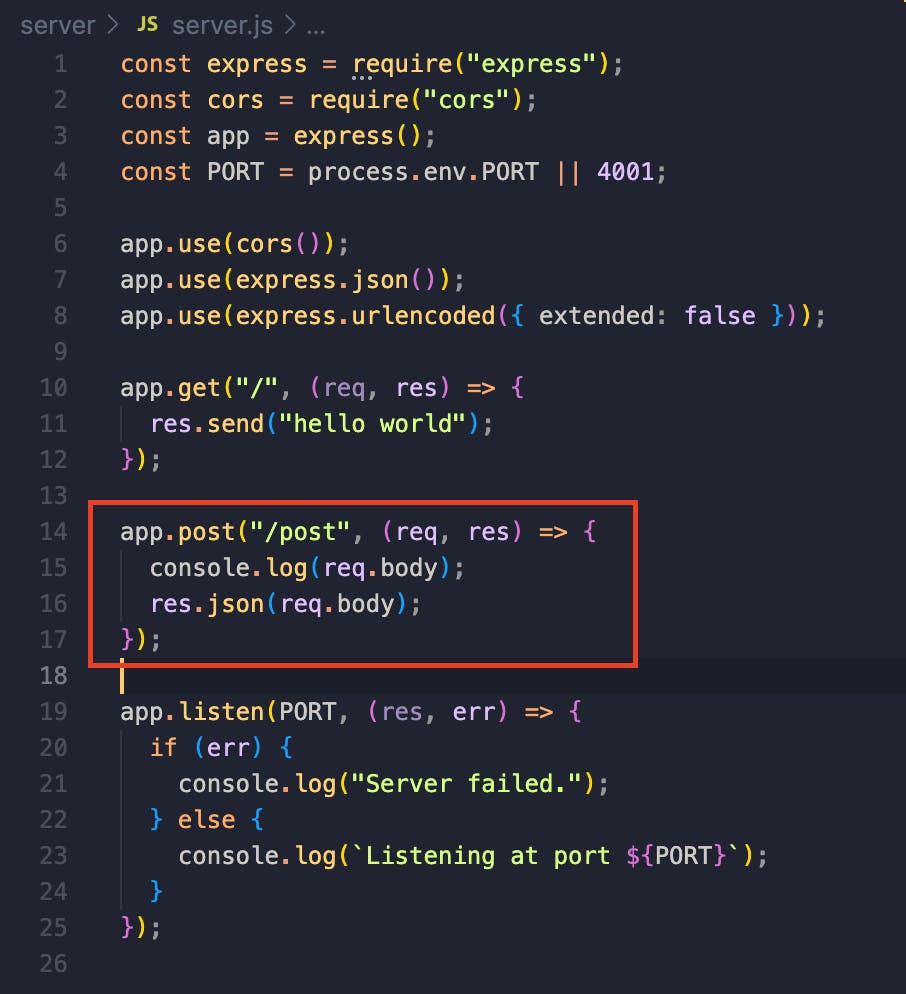
For now, let's just check what we get from req.body and send back as json data to our client.
reqis what our client sends us asjsonin thebody. So we can simplyconsole.log(req.body)to see the data. This is also why we typedapp.use(express.json())so we can see thereq.body.
Config our form page
So far, we created our form page and prepared it to post some data to a server. But, we never told it how to use our server's URL which is at the moment localhost:4001. Let's get back to our client-side and make some adjustments.
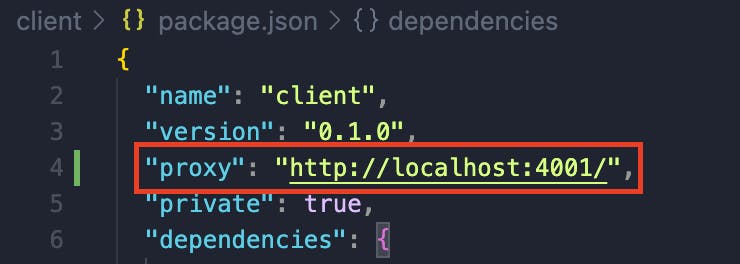
Don't worry, it's pretty simple. Just open the package.json inside the client folder. And add "proxy": "http://localhost:4001/". That way, when we fetch a post request, the receiver will be our server.
Eventually, we are going to change this URL when we host our server in Heroku. For now, it will do.
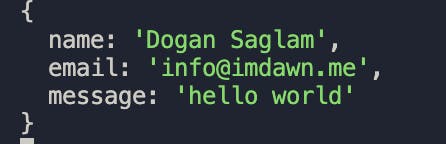
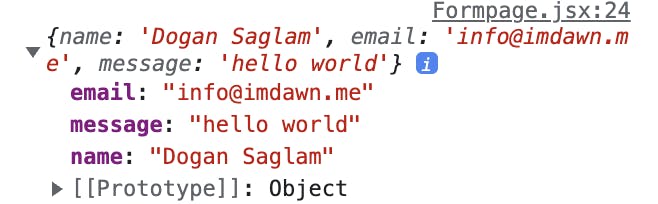
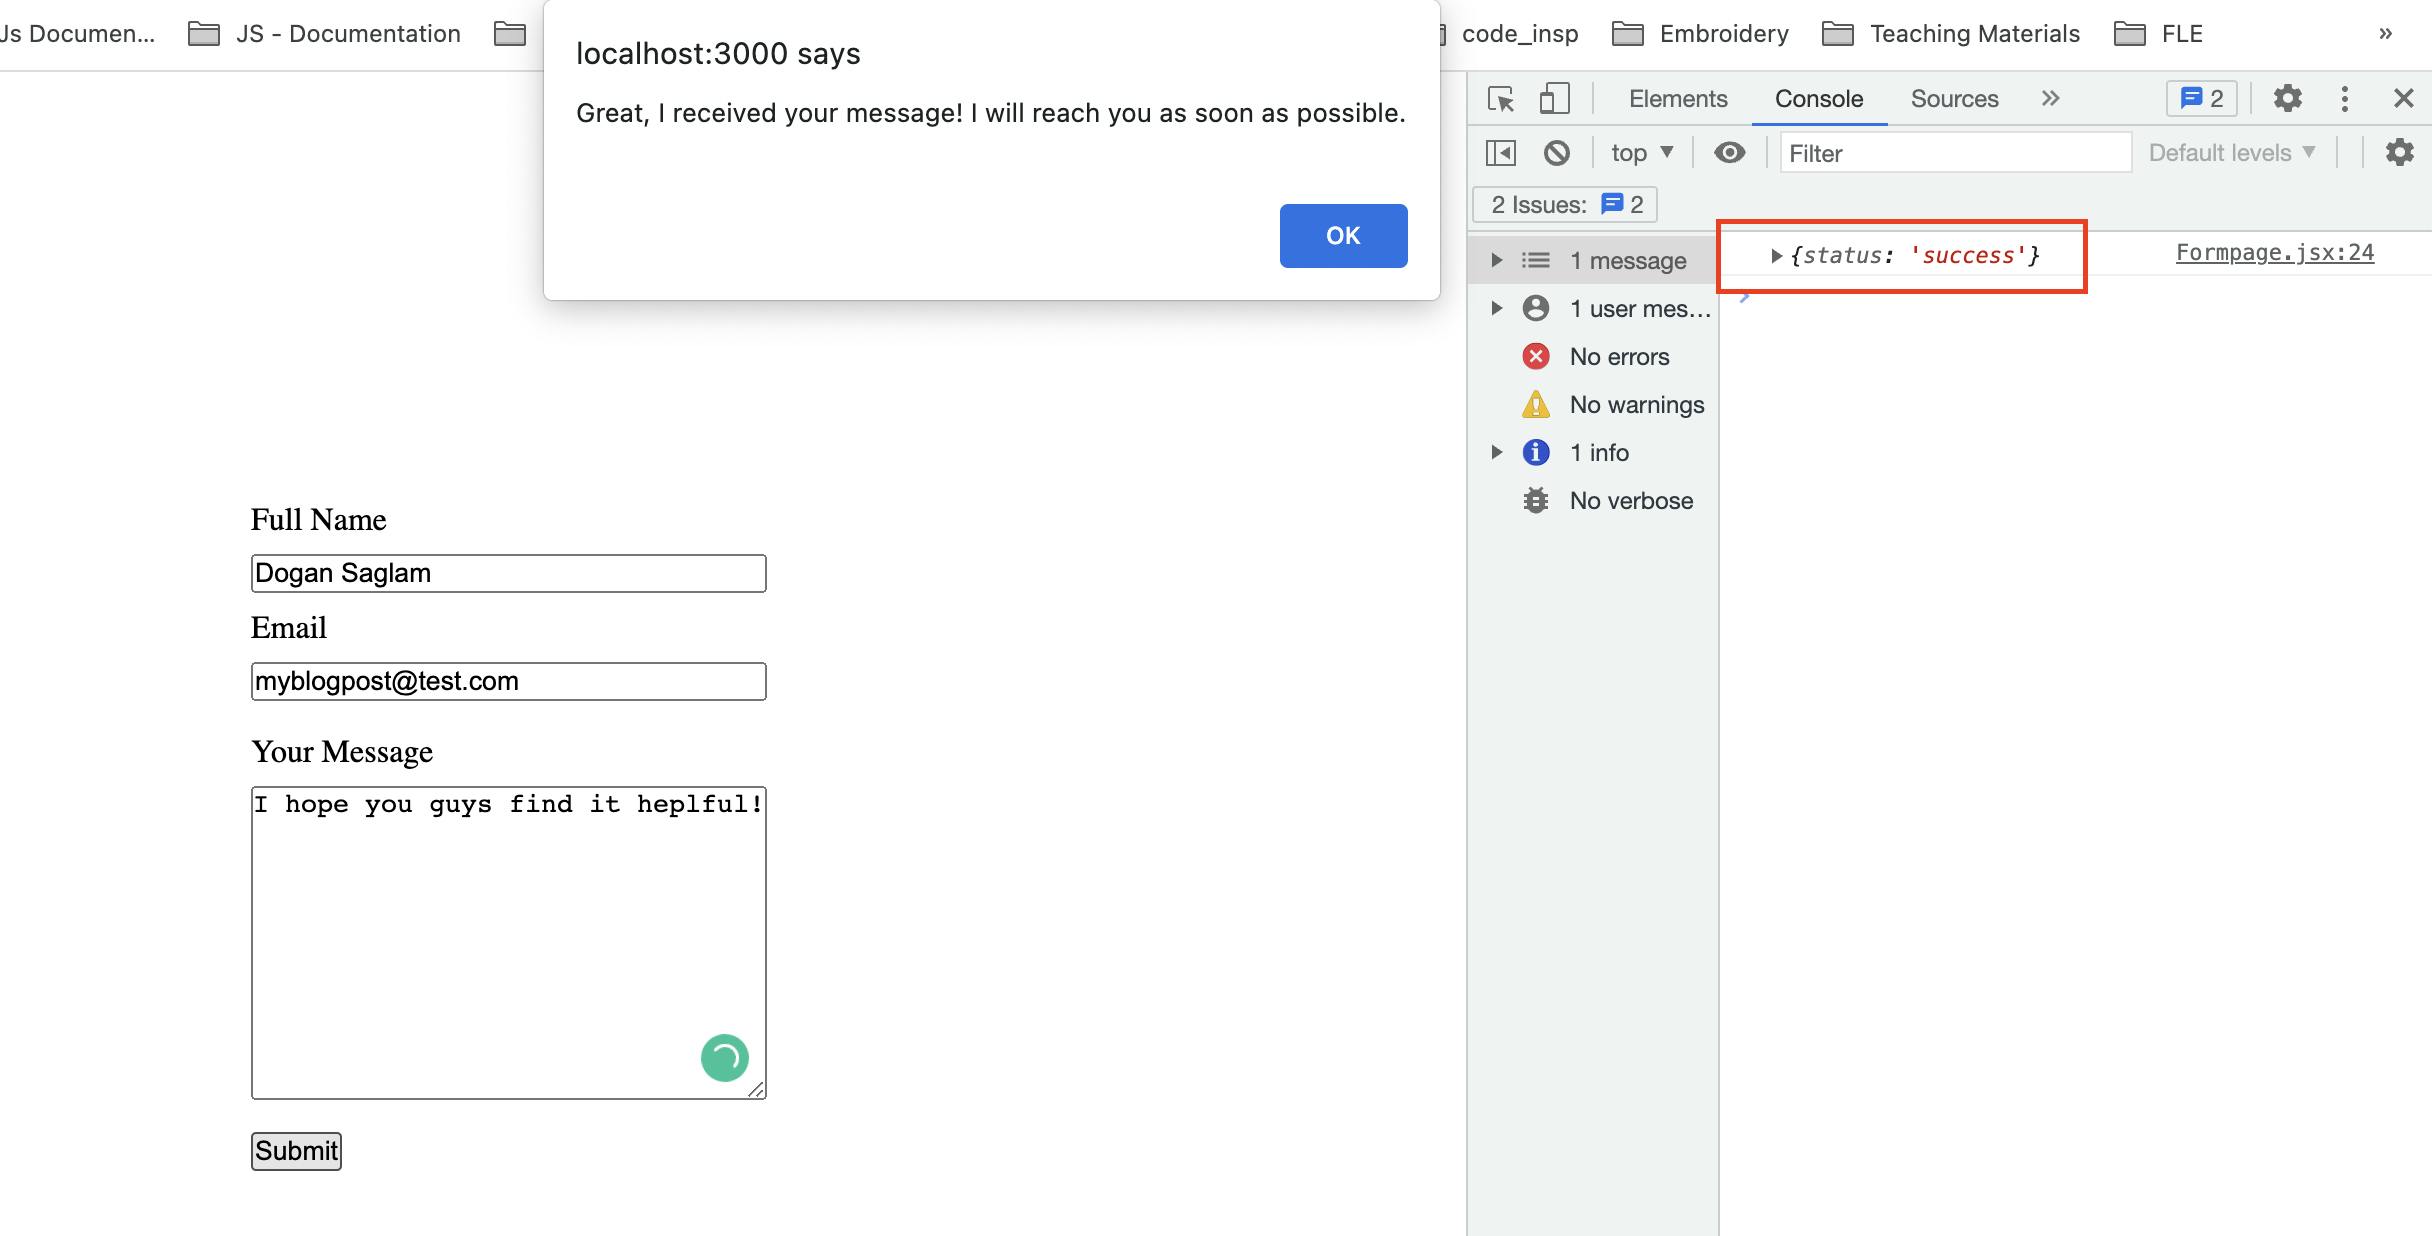
Alright, now everything is ready! Let's try if everything is working fine. Remember, we put a console.log inside both server and client-side. So, when we post our data we should see the input data. Now, go to our client form page and fill in the input fields. Then hit submit button.
We should see our data logged in the client form page's console and in the server terminal:
If you stayed with me up until here, you should know that you are awesome! We're done with the hard part. Let's take a break to drink some water and rest our eyes. You deserved it. 🙌
Complete handleSubmit function
Alright, the break is over. Let's finish our handleSubmit function because obviously, we don't want to just console log data back and forth. Instead, what we want is:
- Send the input data to our server
- Inform the user that the form was submitted successfully or that an error occurred
- Reset the input fields
Our
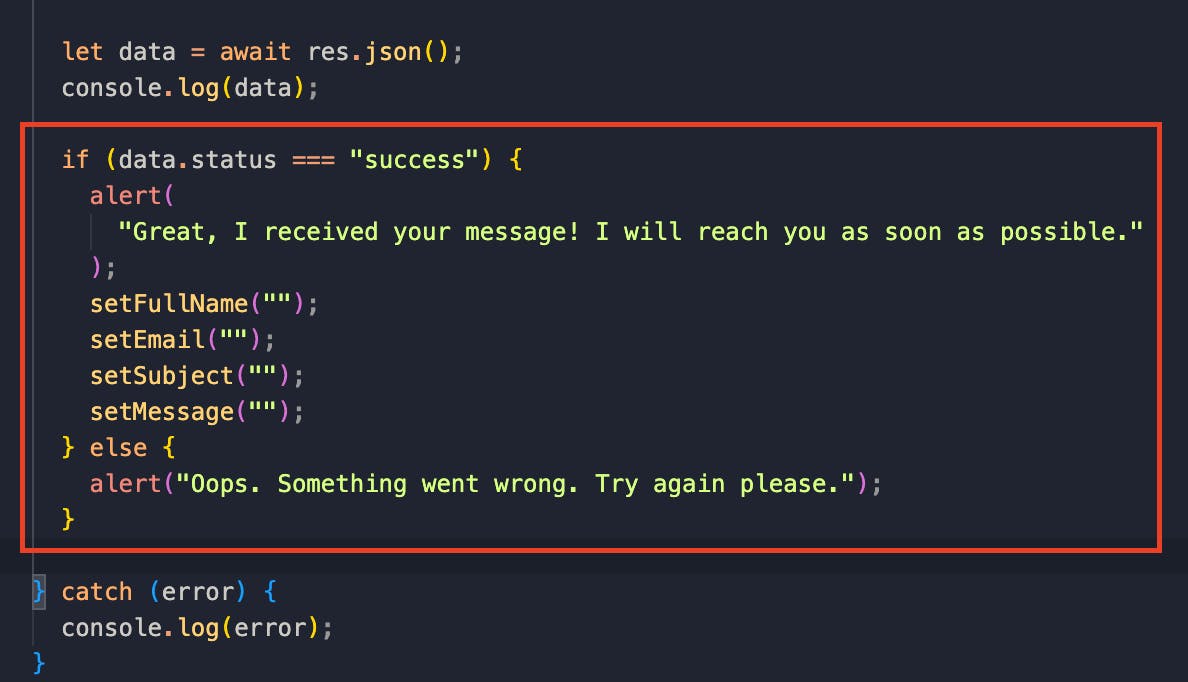
handleSubmitfunction should look like this. We are not going to add anything else but just change thepostURL when we host the server.
Earlier, we saw that our server can send a response in json format. And we can use the data inside that response. Here, we are simply saying "if data has an object named status and its value equals to string success then do something else alert the user with string 'something went wrong' ".
If it's a success, we are going to clear our input fields. But to do so, we must update our input fields in our code. Go ahead and add value property to the inputs and set it to their respective states that we declared when we started. It should look like this:

Everything is ready on our client-side. Now, we can move to our server and handle the client-side requests and send the data as an email to our own accounts.
Implementing nodemailer package
When we built our server, we installed nodemailer. It is an easy-to-use node package that allows us to send emails with NodeJs. We can use services like Gmail or custom email addresses. But what worked for me was using Gmail so I will show you this method. I suggest you check the nodemailer docs for more details about using custom email addresses.
Let's require nodemailer in our
server.jsfile to use it
First of all, we should create a variable that keeps the service and authentication information. This will be basically our email transmitter.
When you are using Gmail as a service, you must generate an app password which is a 16-character code. You can click here for the instructors.
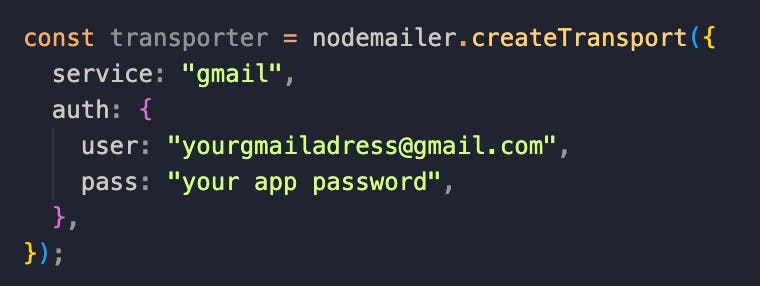
We are using nodemailer's createTransport method and passing the essential information. You should put your own email and app password.
Now, we can create the email format that the nodemailer will send us.
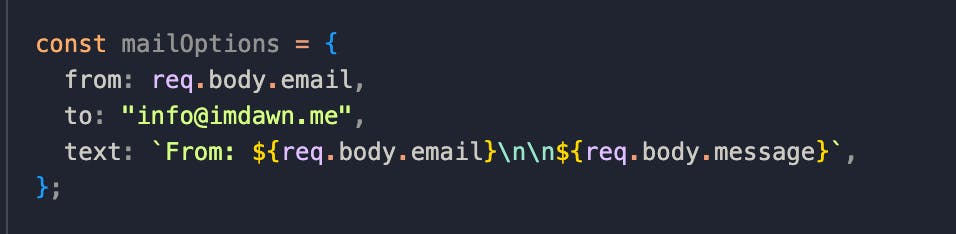
to: "info@imdawn.me"is the email address that nodemailer will send the contact form data by using our Gmail address.
Finally, we are going to send the email and send back a response to our client-side. That way, we are going to inform the user that the email was received.
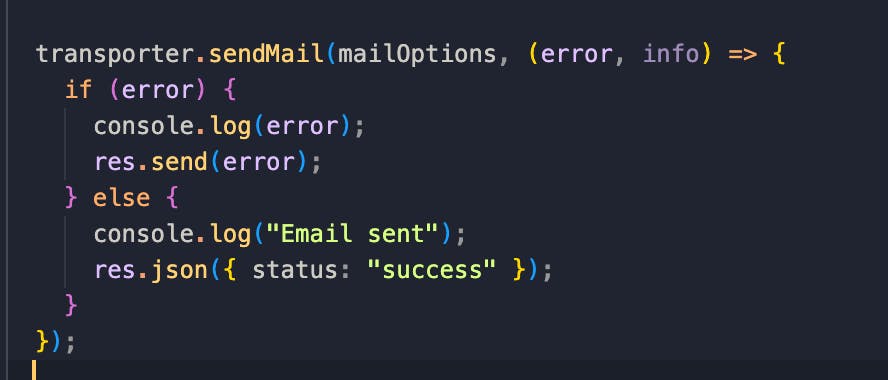
In order to send the email, we are using sendMail method that nodemailer provides us. And just passing down the data to be sent.
Remember that in our client-side code, our application expects a response that has
{ status: "success" }object to continue. Here, we are sending back a response asjson.
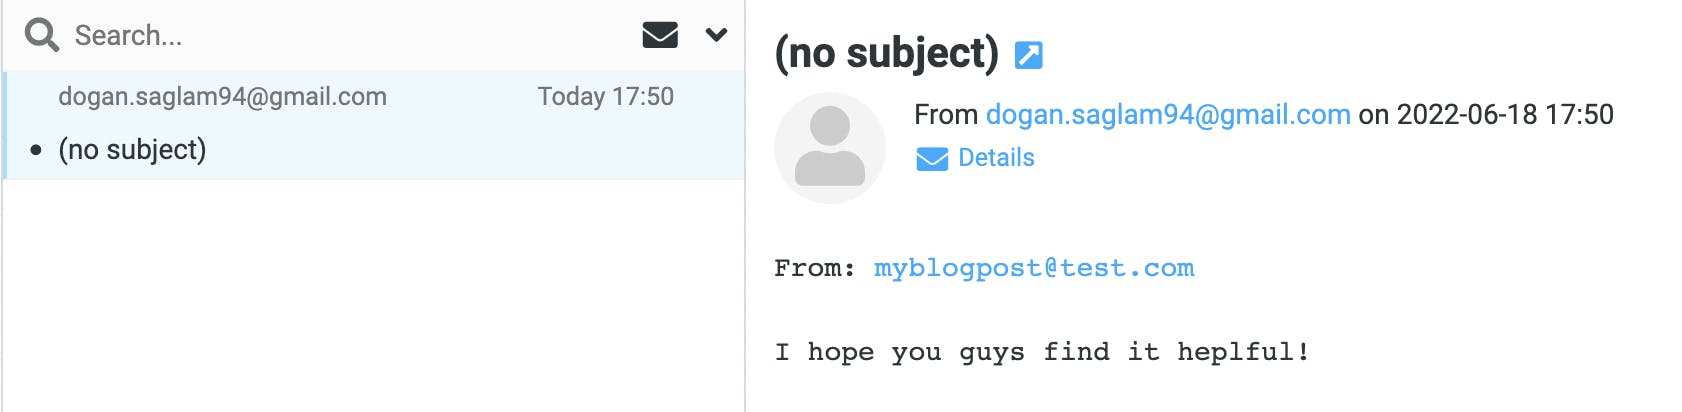
Alright! Let's try sending an email. Now, fill in the input fields and submit the form. This time, you should see the alert confirming that the data was sent. And when you check your targetted email, you should see it in your mailbox.
Submitting the form:
Receiving it as email:
If you are reading this, give yourself a pat on the back. You deserved it. You successfully created your REST API for your projects. Now, you can keep in touch with your potential clients.
Hosting REST API on Heroku
Only one thing left to do: hosting our server with Heroku so it's always accessible. As we talked about it before, we are going to use Heroku as our hosting service since it's 100% free.
You can head over to heroku to create your account. When you are done creating, we will continue.
Before uploading everything on Heroku, we should initialize our server folder. But first, we must create a .gitignore file to put node_modules in it. Then, we type these commands in order:
git init
git add .
git commit -m "first commit"
Then, you should create a new repository in your GitHub account. You can name it whatever you like.
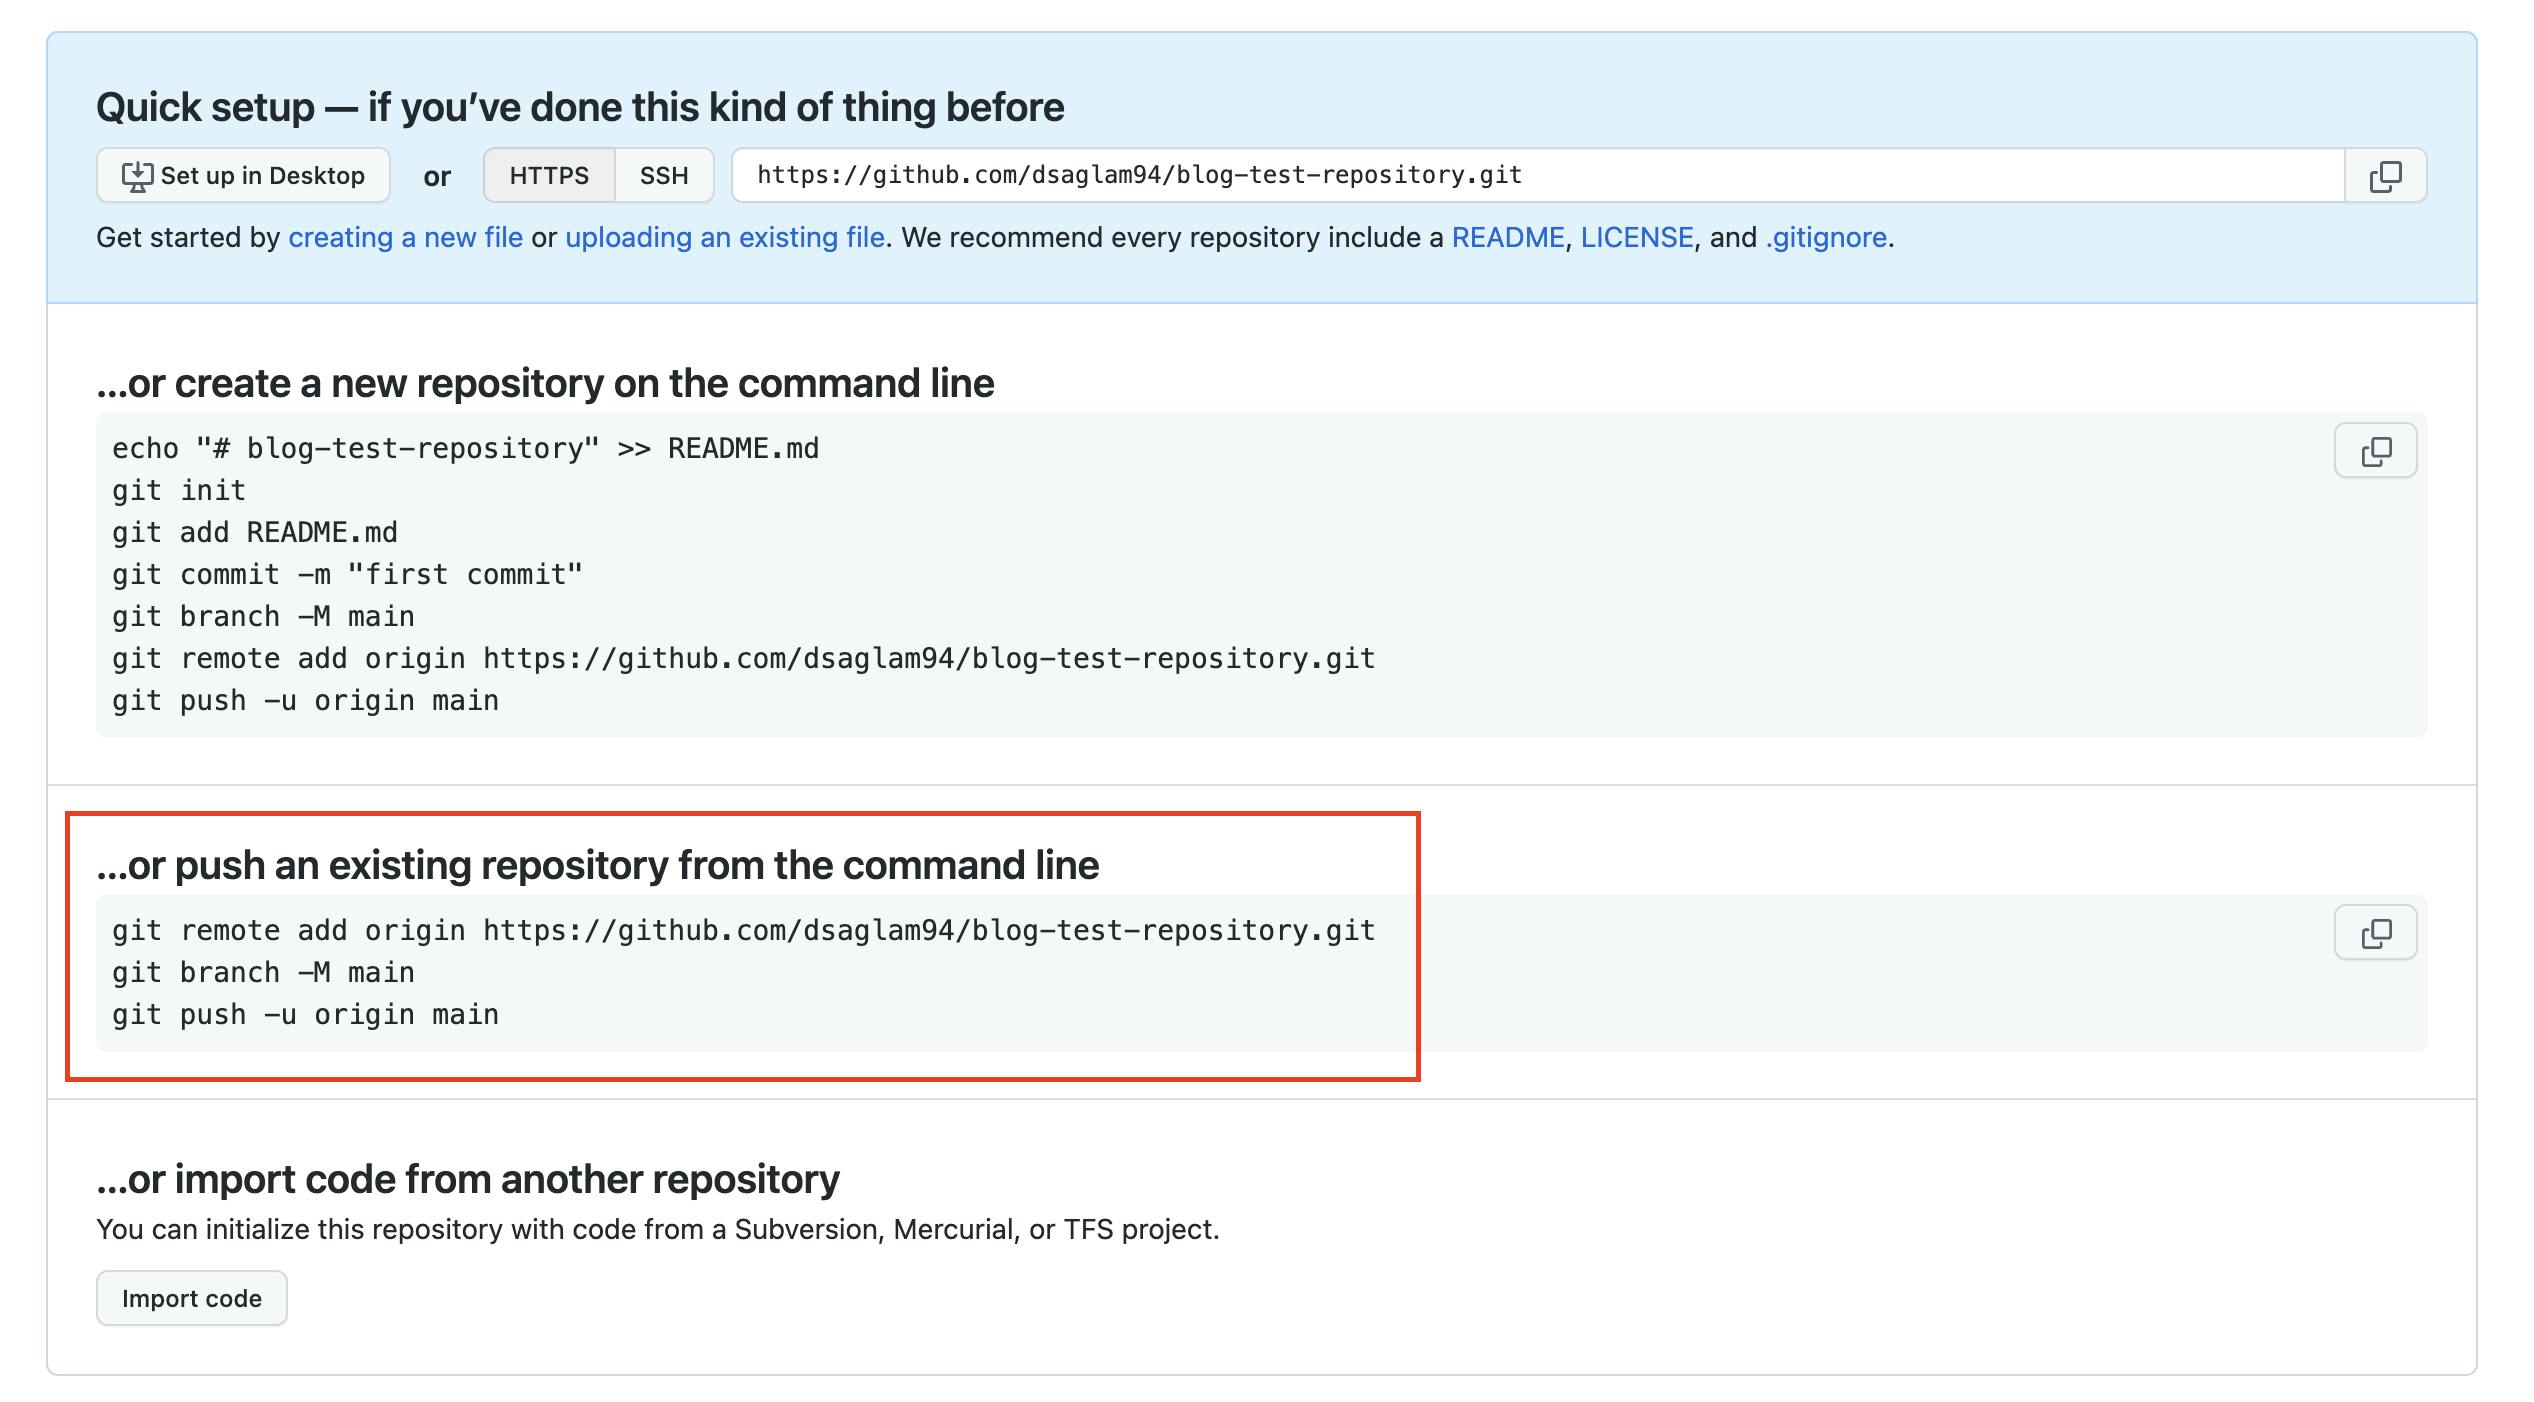
Since we are deploying an existing project, we can just copy and paste these three commands from the GitHub page. After pushing your project is finished, you can refresh the GitHub page and see the files inside the repository.
Now, get back to our server terminal. Type heroku login. This will direct you to Heroku's login page. When you successfully log in, you can redirect to your code editor.

Next, we will create our project and name it in Heroku by typing heroku create your-project-name. (Again, you can name it whatever you like.)
If the name is not taken, you will see this line:

Great! Now, we must tell Heroku how to start our project. In order to do that, we must add this line of code to our terminal: echo "web: node server.js" > Procfile. When we push our project to Heroku, this file will eventually tell the program how to run our project. Then type these commands in order:
git add .
git commit -m "pushed test project to heroku"
git push heroku main
If your main branch is not named as
mainbutmasteror something else, you should change the command.
It will take Heroku a couple of seconds to build our project. When it's done, we can go and check our project in Heroku dashboard. Click your project and then click the open app button. This will lead you to your project's URL.


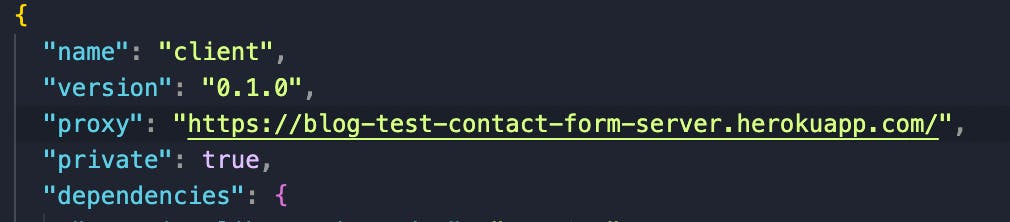
If everything went well, your project should be alive. Now, the final thing to do: copy the URL and open your React project's package.json file. Remember that we added "proxy": "http://localhost:4001/". We will change this URL with our new project URL on Heroku.
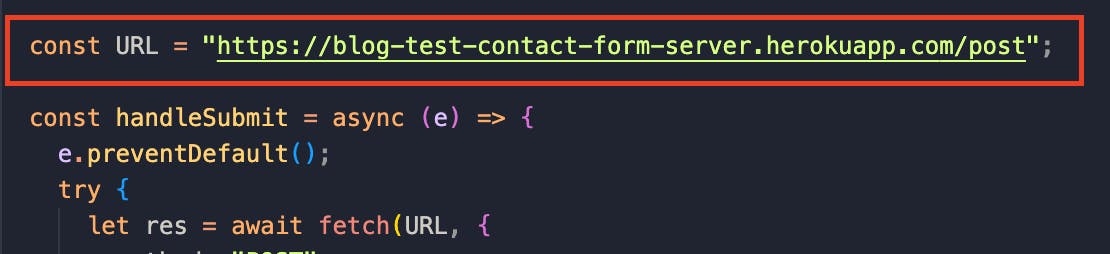
Next, open your form page component and change the old path that we used to test our server with the new one. Since we fetch a post request, we must add the /post endpoint to our URL, too.
Alright. This is it. It's done. You successfully created your REST API and host it on the cloud. You should be really proud of yourself! 🥳
If you liked this article make sure to follow me on Hashnode or on Twitter where I share my journey.
If you'd like to go even further and support my work, I'm telling you: I won't stop you. 🫣